In the world of insulation, there are many choices to be made. Should you replace or add insulation? What’s the right R-Value? The list can go on and on. But, we at JM welcome any questions you may have about insulation and always want you to be informed. We recently received this question about the unfaced insulation:
“Hey JM! I need unfaced insulation to fit in a 2’x 4’ exterior wall. Can the Kraft-faced be removed easily? I’m just repairing a small amount of wall. My local hardware store doesn’t seem to have the unfaced version of this in stock in stores. The exterior walls are stucco and they need some air circulation to allow moisture to dissipate.”
In order to answer this question, let’s talk about the difference between Unfaced and Kraft-faced fiberglass insulation.
WHAT’S THE DIFFERENCE AND HOW TO INSTALL?
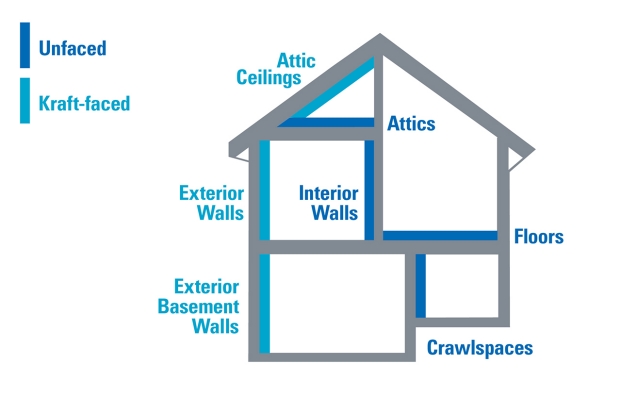
Unfaced means the insulation lacks a vapor retarder (paper or plastic facing). Unfaced insulation is great for new construction, remodels, walls, floors, ceilings, basements, attics and crawlspaces. It’s best used for interior wall applications that do not face the outside and also in rooms that don’t need moisture control, like living rooms, dining rooms and studies. It should fit snugly into the space but shouldn’t be compressed. One particular note: Unfaced (as well as Kraft-faced) insulation should always be cut to fit with a utility knife and never folded over for the best performance.
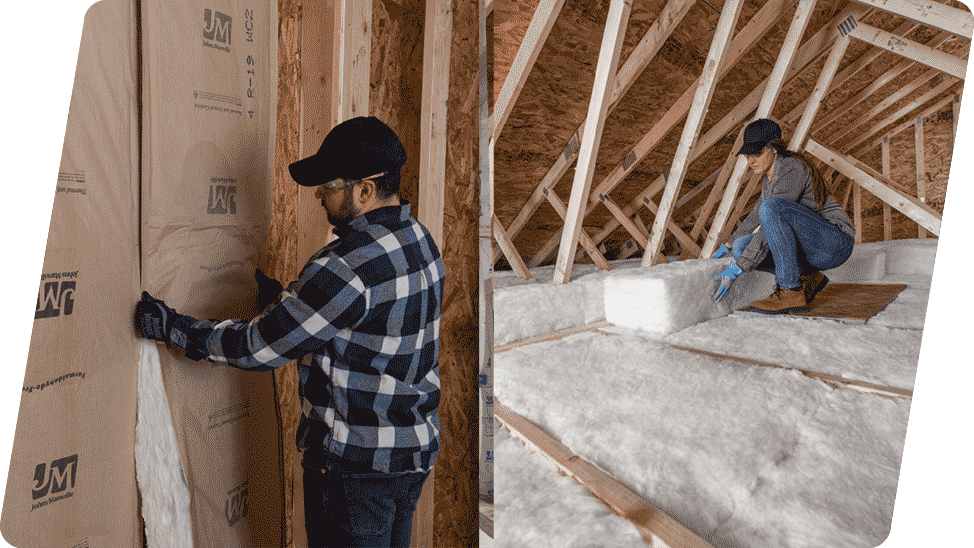
Kraft-faced insulation includes a paper vapor retarder, which helps prevent mold and mildew. Kraft-faced insulation should be installed in exterior walls, exterior basement walls, and attic ceilings by pressing the product into the wall cavity with the paper side facing outward, towards the installer. The insulation should be snug in the cavity, but not compressed. If the product needs additional support, consider using a staple gun to hold the insulation in place. It’s also very important to check local building codes for vapor retarder requirements when tackling an insulation installation job.

WHAT SHOULD THE CUSTOMER DO?
To address the question above and based on the customer’s particular situation, all they need to do is remove the Kraft paper from the insulation they’ve purchased to repair the hole. Luckily, the Kraft paper facing is easy to remove. Simply pull on the facing with one hand and use the other hand to push the batt or roll away from the facing. Then, you’ll be able to proceed with the repair.
Should you choose to install Kraft-faced insulation, here’s a helpful video and guide. Plus, use the JM insulation calculator to determine the recommended R-value for your project, as well as the type and amount of insulation you’ll need to complete your project.
There’s a lot to learn when it comes to insulation, but we’re always happy to help answer your questions. Come back soon for more DIY insights and information for your home.

